Firstly,
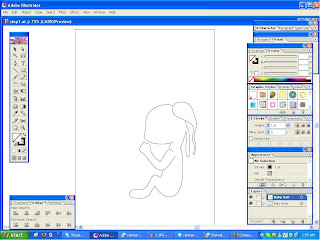
 I drew some parts with pen tool and pencil tool, kinda like a mixture to test out the pens, ya' see? For additional info, The top part of the face (left) is done with pen tool, and the rest is pencil, I'm more used to pencil tool. As you can see, this is the shape of a baby, a representative of our future generations.
Secondly,
 Ta dah! 2nd layer! I added in baby's hair, and the hair looks melty-ish to make the baby look candle-ish. Well, she is suppose to be a candle.
Thirdly,
 Added the 1st part of the fire, I used gradient tool on the fire to make it look more realistic.
And so,
 And yeah, I did gradient-y part for each other flame colours in the flame too, in different layer to prevent it from overlapping each other. That's afterall, the use of layers, right? I also added gradient-y on the candle baby girl to make it look more realistic.
Then,
 Nothing much here, added more gradient-y on candle baby.
Next,
 This is the tricky part. I used blending on my pencil lines to make the colours mix in such a way it shows a very different kind of gradient colours, it does look like the baby is melting in a way, doesn't it?. How to blend? Object > Blend > Blend Options > Specified steps > set number > Blend. ;) I love this trick, though.
Almost there,
 And so I use the same blending trick on the fire shining thingie, with the Ellipse tool.
Conclusion,
 And I move it into the middle.
Simple? Explanation of symbol will be done on the post.


No comments:
Post a Comment